

When first getting started in the studio with audio mixing, the task can be somewhat intimidating. You may have questions like when to add effects or what order to mix in. Fortunately, we have some great tips for beginners to hone their skills and get their feet wet.
Get a Good Recording
The first part of a good mix actually happens before the mixing process. To give oneself the most room to work with, capturing a good recording off the bat is essential. When recording, get the source of the sound as close to the microphone as possible to help eliminate background noise. It is important to keep in mind the proximity effect, which is where bass frequencies are boosted the closer the sound source is to the microphone. The level to record at is -10 to -15dB, ideally at -12dB on average, with the peaks going to higher than around -5dB.
If working with midi make sure the output on the digital instrument is at a level where it is audible and around that -12dB range, but without pushing the velocity too high. Doing this will help lay a strong foundation to build from.

Setting Levels
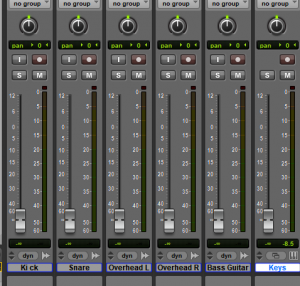
Once all the main parts are recorded, set all sliders on the meters to the bottom. From here, you will bring each instrument into the fold one section at a time.
The best way to approach this is to listen to a song in the same style you are trying to replicate. Then set your headphones and on your monitors at a comfortable level. Once you have the volume set open up your session. From here, you will want to start with the more foundational instruments like percussion and bass. Start with one, and bring up each instrument to a level that is comfortable with the sound you are going for. If mixing a full drum kit, start with the kick, then snare, toms, cymbals, etc. Get the kit sounding how you want it individually and together.
Once you’ve done this, bring in the next instrument. Say bass is next, you’ll want to solo it and bring it to a level that sounds clear and audible. Next, un-solo it and adjust the level so it is aligned how you want with the drums you have level set previously. Next, you may want to move onto harmony parts such as rhythm guitar and keys, and then more melodic components, bringing each part up to an appropriate level and then mixing it with what you’ve set previously.
A good approach to take is to do this by section. Maybe start with the intro, get everything set, and then move to the first verse or whichever part comes next in your song. This way you can finish a section fully one at a time, and plan your automation better, which we will get to soon.
Panning
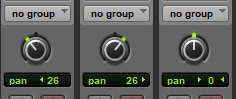
As you go about level setting also consider the panning knobs. These are used to add stereo width to the mix. Instead of having everything coming at you from the front, you can use panning to bring the mix to life.
To simplify, if it is a mono sound source, panning will tell that signal which part of the stereo field to come through and send the volume there. Think of it as sitting in front of a stage. The instruments and speakers are not all in front of you, but rather coming from different places and sources. This point of view is also the one you want to consider with panning. If this instrument or part were being played on stage, which area or speaker might one hear it from?
If the track is stereo there will be a left and right panning knob, which lets you set how wide you want the stereo width of that track. Remember not to set a stereo track to 100 on both sides as it almost counters to the point of panning.
Most kicks, snares, and bass parts are panned to the dead center, while embellishments are often panned to one side or the other.
Equalization
As you go about level setting after the initial recording, effects and processing are something you may want to apply and adjust as you go. Once you’ve got a drum kit level set, for example, you may want to apply equalization (EQ) to it. It can be used to boost frequencies with sounds and textures you want and attenuate those you don’t. The best rule of thumb to keep in mind is that not every part needs processing, and it’s important to trust one’s ear as you build it over time.
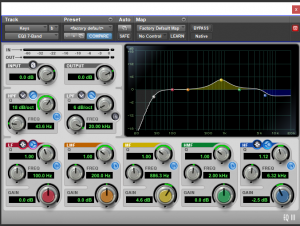
For EQ you can start by listening to a problem sound. Say a tom hit has too much resonance. Pull open your EQ, and take a band, and boost and attenuate certain frequency ranges until the problem frequency is loud and clear. Now you can begin narrowing down on the frequency range and make the boost and/or attenuation less drastic until you’ve cut or boosted what you need to. There should be a meter to tell you the input and output volume of the track. Make sure they are equal so it does not alter the level you’ve set previously.
Say you’ve lowered the volume of a few frequencies, that means the overall volume will be lower. There is typically an output gain knob to make up for this and match the input and output and vice versa if you’ve boosted a few frequencies. Once this is done if you feel you need to adjust the fader you can.
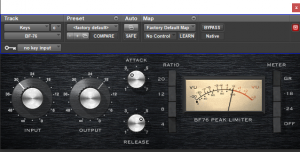
Compression
The other most popular and important processing effect is compression. Again, not everything needs compression – trust your ear. Compression is used to make a track more dynamically consistent. It can be used to make a kick and snare drum thump and push through, or a vocal track cut through the mix and be at the forefront of the listening experience.
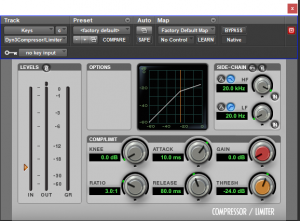
Compressors have a few settings, and they may be labeled as different things depending on which compressor you are using. The few that are important to keep in mind are the threshold (the compressor may have input and output knobs instead), the ratio, the attack, and the release. The threshold tells you at what level the sound needs to breach for the compressor to activate. The ratio is how hard the compressor almost clamps down on the sound. The attack is how fast
the compressor reacts, and the release is how fast it lets off. Play around with one until you are comfortable with what each setting and knob does.
Different instruments call for different settings. For example, drums and bass typically require a higher ratio than say a guitar. As with applying EQ, make sure the input and output volumes are as close to equal as possible.
Automation
Automation is kind of how it sounds – it is telling a setting when to do something. If in one section you want an instrument to be loud but in the next section you want it to back off, you can set the automation on the fader to do just that. It is an important part of really bringing a mix to life. Plug-ins can be automated too.
![]()
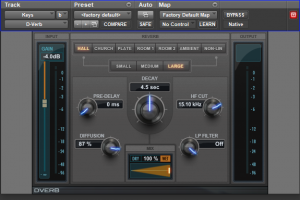
Further Effects and Processing
All of the fun effects like reverb, saturation, and chorus, are often applied towards the end of the mixing process. Delay effects like reverb, chorus, and delay are all important but not everything needs it. Oftentimes bass-heavy instruments will forgo these or else you risk too much of a muddy and washed-out sound.
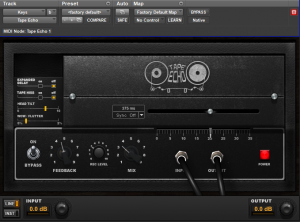
When applying them make sure you use auxiliary channels with a bus input with the plug-in on them. Then send the instruments to them using a send channel. This way you keep the dry signal and can use the send fader to adjust how wet you want the delay effect. This also lets you send multiple instruments to the same reverb for example, which in a lot of cases, you will want to so the mix is more cohesive.
Whatever you are mixing, if you keep these tips in mind you’ll be on your way to a better mix in no time. It is important to play with each of these and develop a feel for how they all work and what doesn’t. As always, you’ll start to build your ear and make it a tool you can really trust.
About the Writer
Nick K. is an instrumentalist, performer, songwriter, arranger, and producer from the Philadelphia area. With a degree in Arts in Music from Columbia College Chicago, Nick enjoys playing the guitar and bass guitar and is currently recording and producing an album.
